RADO
The Rado is one of my 2 third year projects. The other being the Memour. This project was designed as part of the Design Innovation in Plastics competition. The 2016-2017 compeition had the brief of 'the future of personal travel'. Despite having the word 'future' in the brief, it was not as a futures project and was intended to be manufacturable with technology available today. The brief also specified that the product should not be like anything else currently on the market, be this either through major aesthetic differences or a unique function.
I am personally not a great fan of travelling. I don't enjoy it so coming up with a product for this project was initally rather difficult. The obvious solution of a suitcase seemed a poor choice as we had done a baggage project during our first year and retreading that area would have been rather dull. I worked with a classmate to create an online mindmap of ideas related to travel, different types of travel and the problems related to them. From this map we both found seperate starting points for our projects. I created a brief for the project that would eventually become the Rado.
The next step for me was to research whether or not the project I was thinking of a starting point did qualify for the Design Innovation in Plastics by making sure it didn't mimic something currently on the market. The initial brief I chose was to make a product that would make it easy to wash clothes while camping or backpacking but similar products already existed. Because of that, the brief was expanded to include drying as well. A specification was then drawn from the new refined brief.
| The use of the device should significantly reduce the time taken for the article of clothing to dry.
-It does not necessarily need to fully dry the items, just reduce the time by at least 75%.
|
The product should be predominately made from plastic.
-The manufacturing methods and overall design should be focused to it being produced from a type of plastic, type to be decided later.
-Storage (provided there is a difference between the two)
|
An electrical socket must not be required while in use.
-Either the process does not require power or the device be battery powered.
-If it is battery powered, the device should be somehow charged in a renewable way
|
The device should be aesthetically pleasing when in use.
-The drying method may reduce time it's in use a lot but it may still spend time out in full view depending on the method.
-If the drying method takes little time, the device should be aesthetically pleasing when in storage (provided there is a difference between the two)
|
Travelling with this product should not risk severe damage to it.
-Either the product should be made of sturdy materials or stored in a way that protects it.
-Should survive a drop from a reasonable height.
|
The device should not be weather dependent.
-The method used should dry the clothing without assistance from the external environment.
|
The device should be easy to use.
-Any section that is handled should be comfortable to hold.
-The method should be easy to do by hand or should be self powered. |
It should be easy to carry the device when not in use.
-Should be either small or collapsible.
-Must be lightweight. |
The drying process should be as energy efficient as possible.
-Avoiding heating methods for drying while removing most of the water. |
The device should contain the water so it can be used indoors.
-Must be waterproof, both inside and out.
|
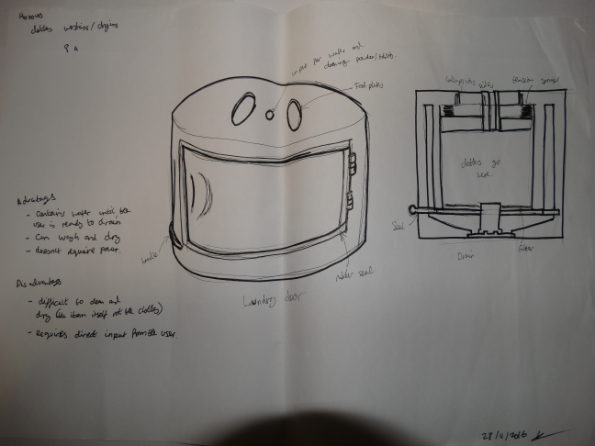
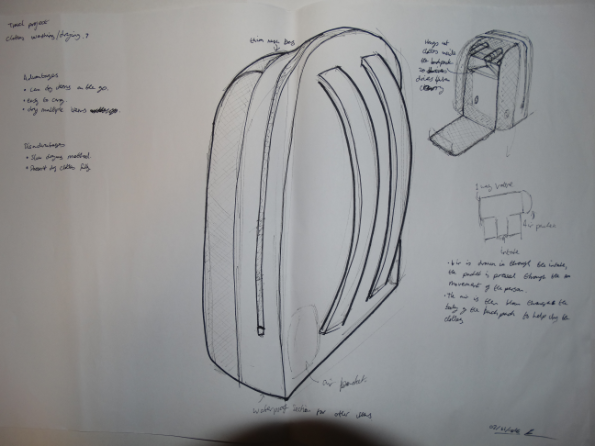
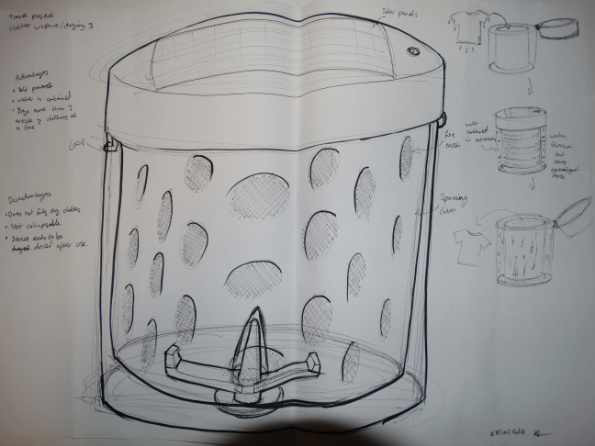
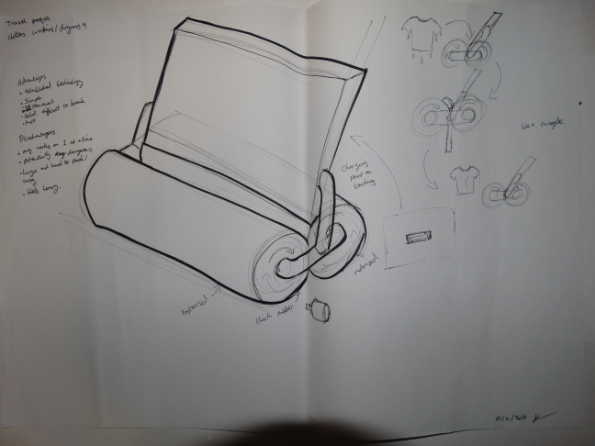
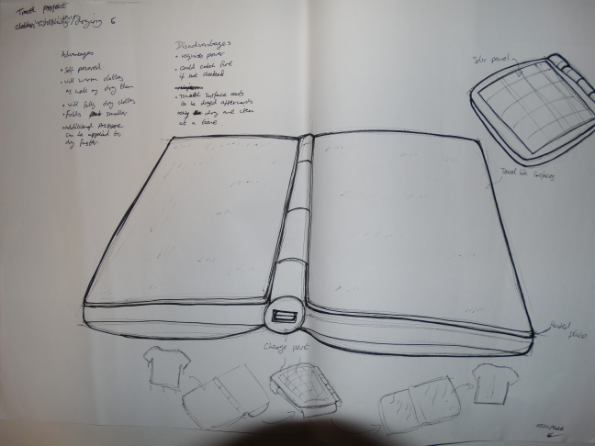
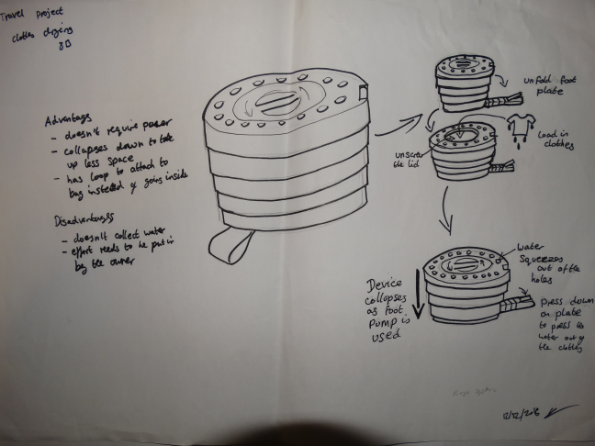
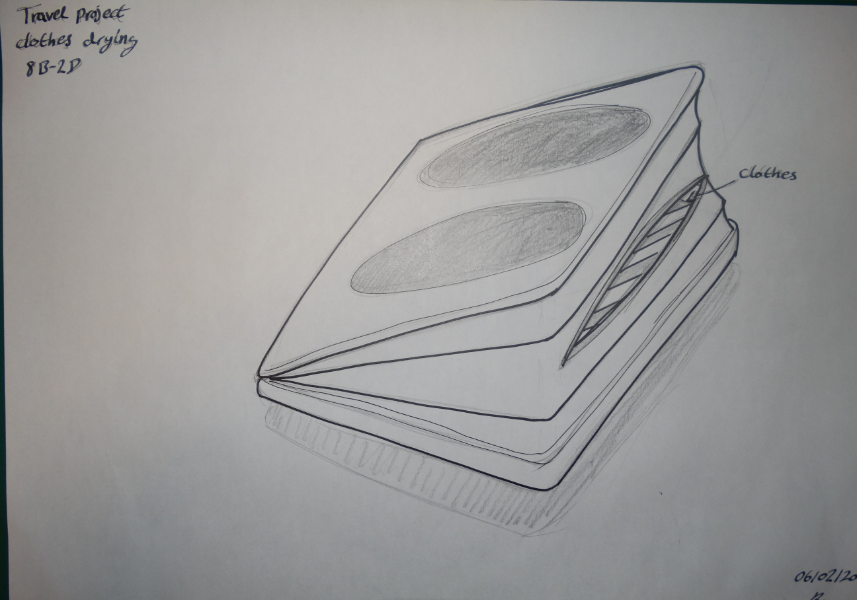
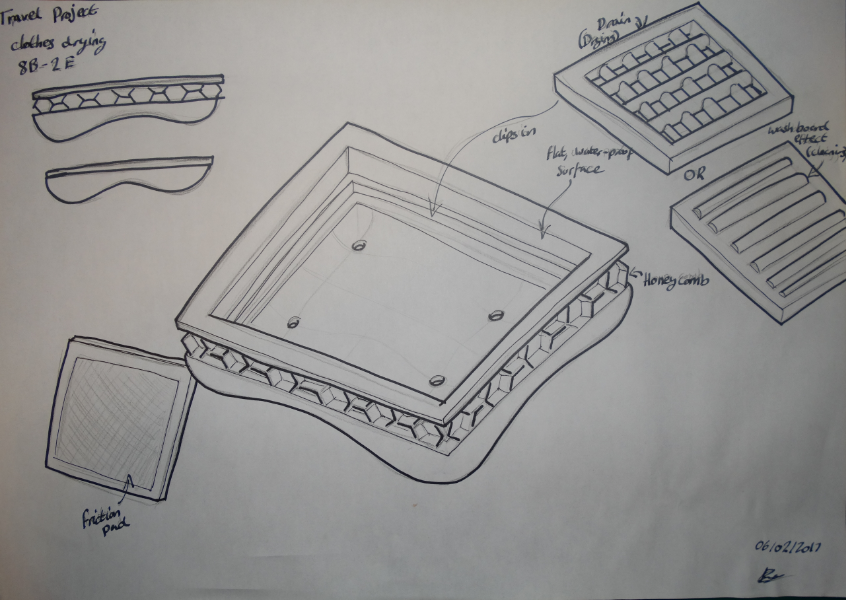
Example initial sketches
The next step was concept generation. Below is a few examples of some of the initial ideas and the sketches done to be taken onto development through tabletop reviews with peers and tutors. As these are just initial sketches, they aren't of the highest artistic quality, they're simply meant to get across an idea of how the product would work.
First Stage Development
After a tabletop review the first of the 5 above concepts was taken forward for development. Obviously a clothes cleaning item needs to be big enough to contain and clean clothing but it being a travel item means it needs to be as small as possible. The next stage for this project was to design some methods of compression.
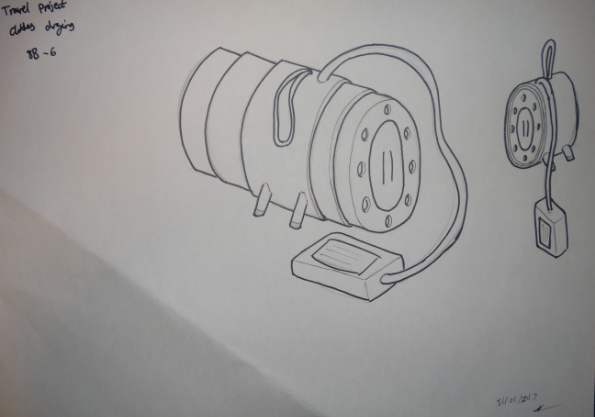
Second Stage Development
For this stage, I focused on how the product would work. Mainly it was a washboard system that would use foot power.
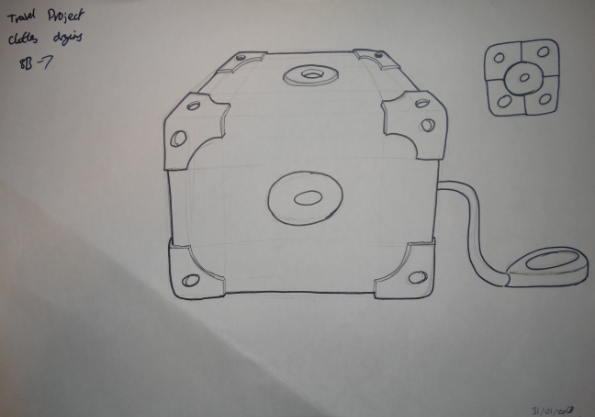
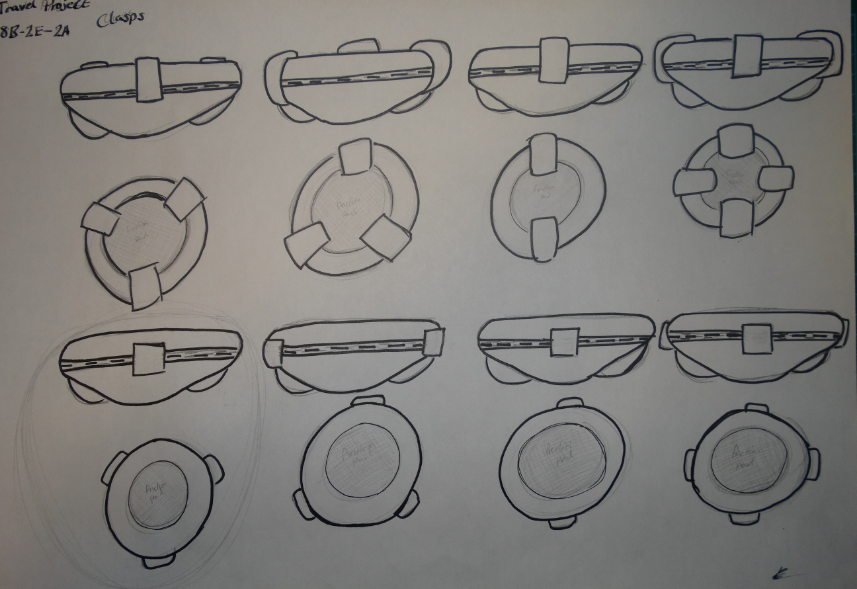
Styling
Next was a thumbnailing exercise to get a good form for the product.
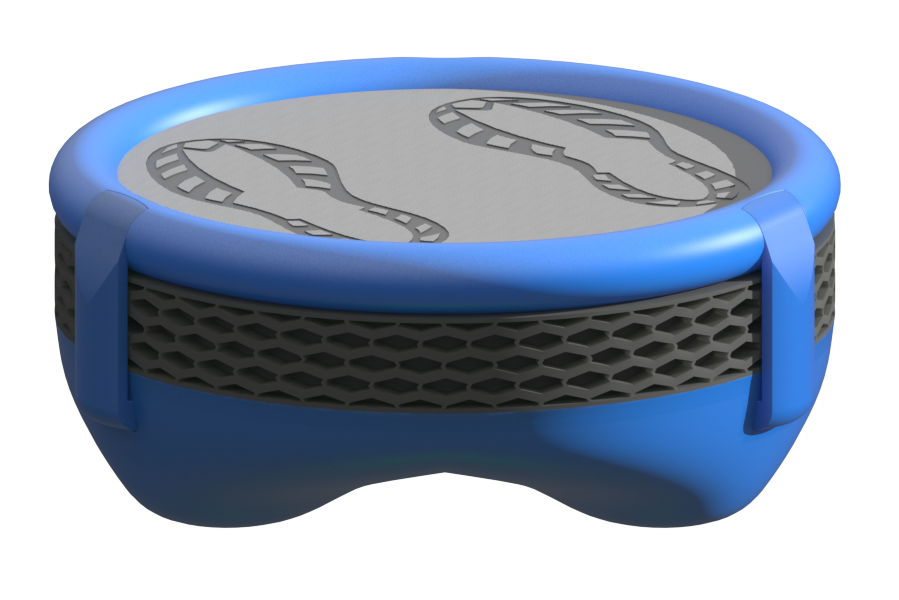
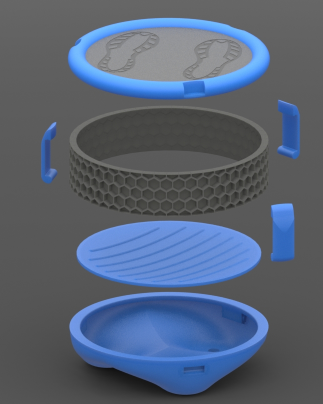
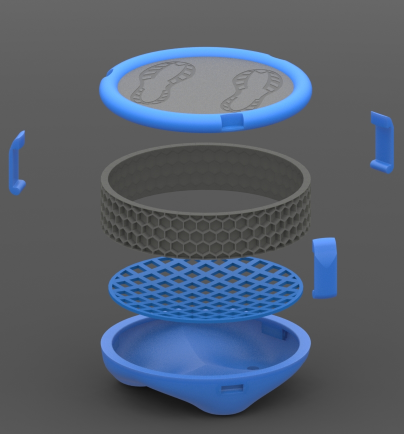
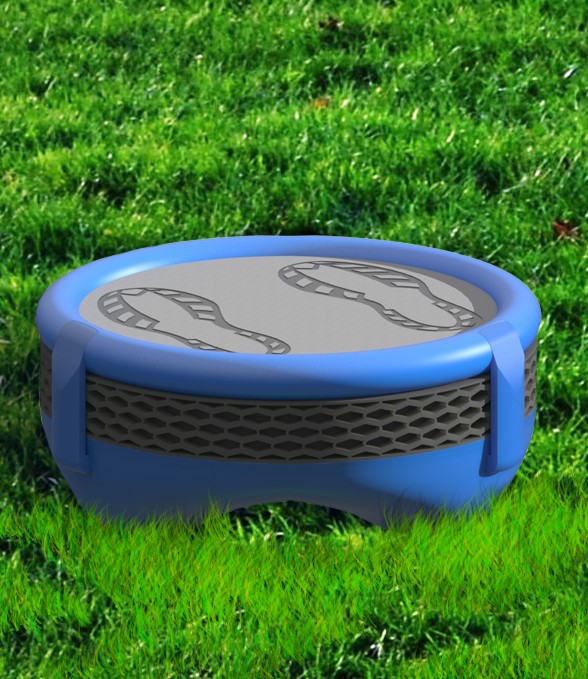
Modelling (Digital)
Now that the styling was done, Solidworks modelling can be started.
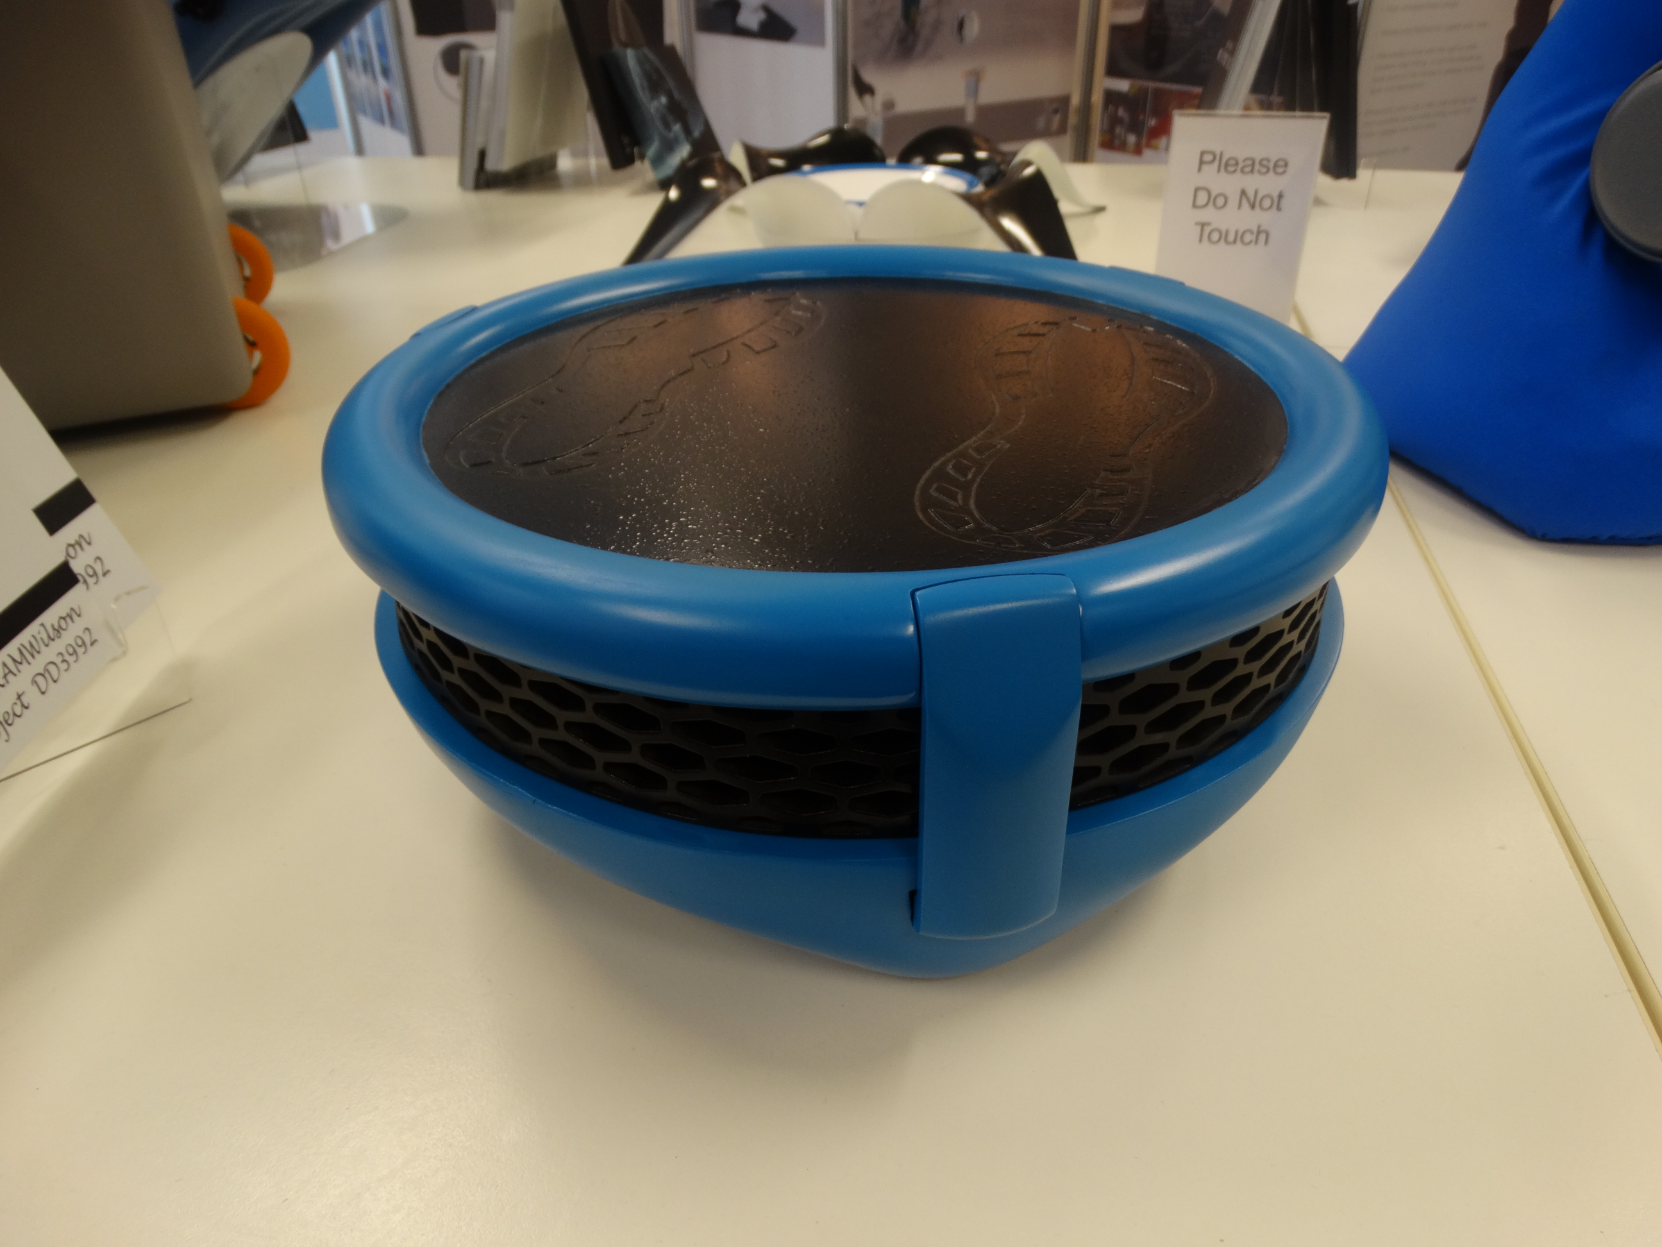
Modelling (physical)
With the CAD model completed, physical modelling could be done. These CAD models were altered to be used on a CNC router to make a lot of of the block foam model. The foam model came off the router with an error, the half of the bottom piece was only semi-routed and had to be filed by hand. The central ring was a flat foam strip that was routed and then bent with the use of a plastic oven. Everything was sanded down flat, primed with a grey primer and sanded again. This process was repeated multiple times until the primed surface was smooth. Paint was then applied to model.
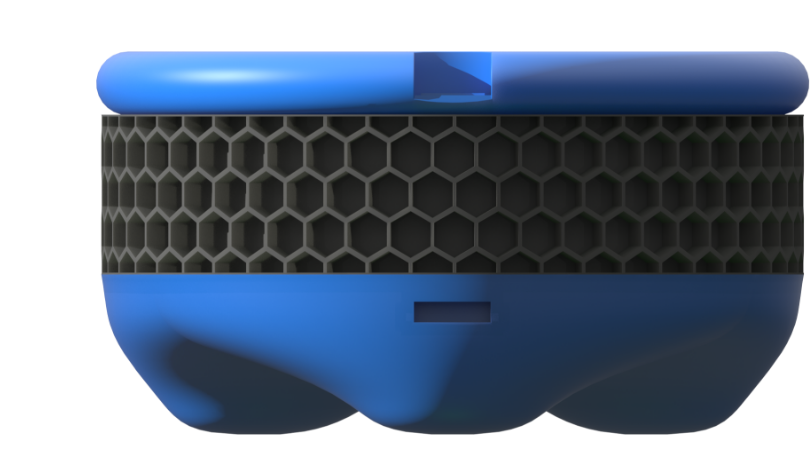
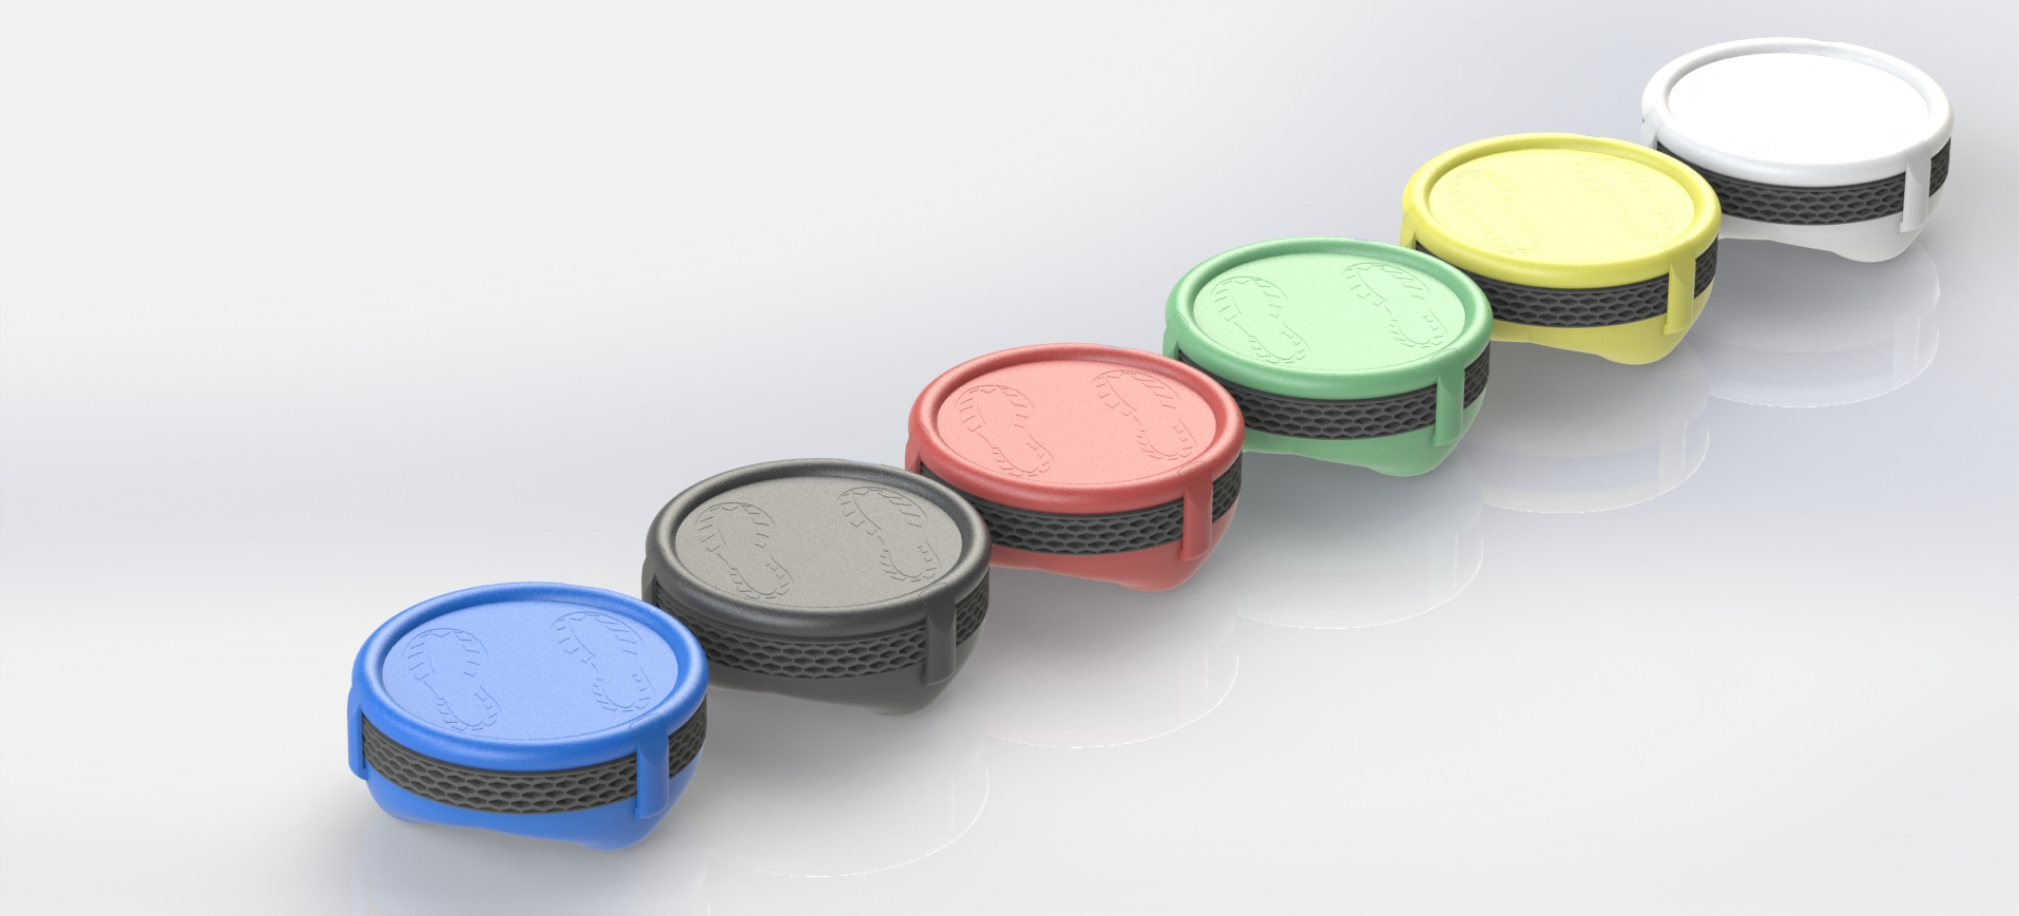
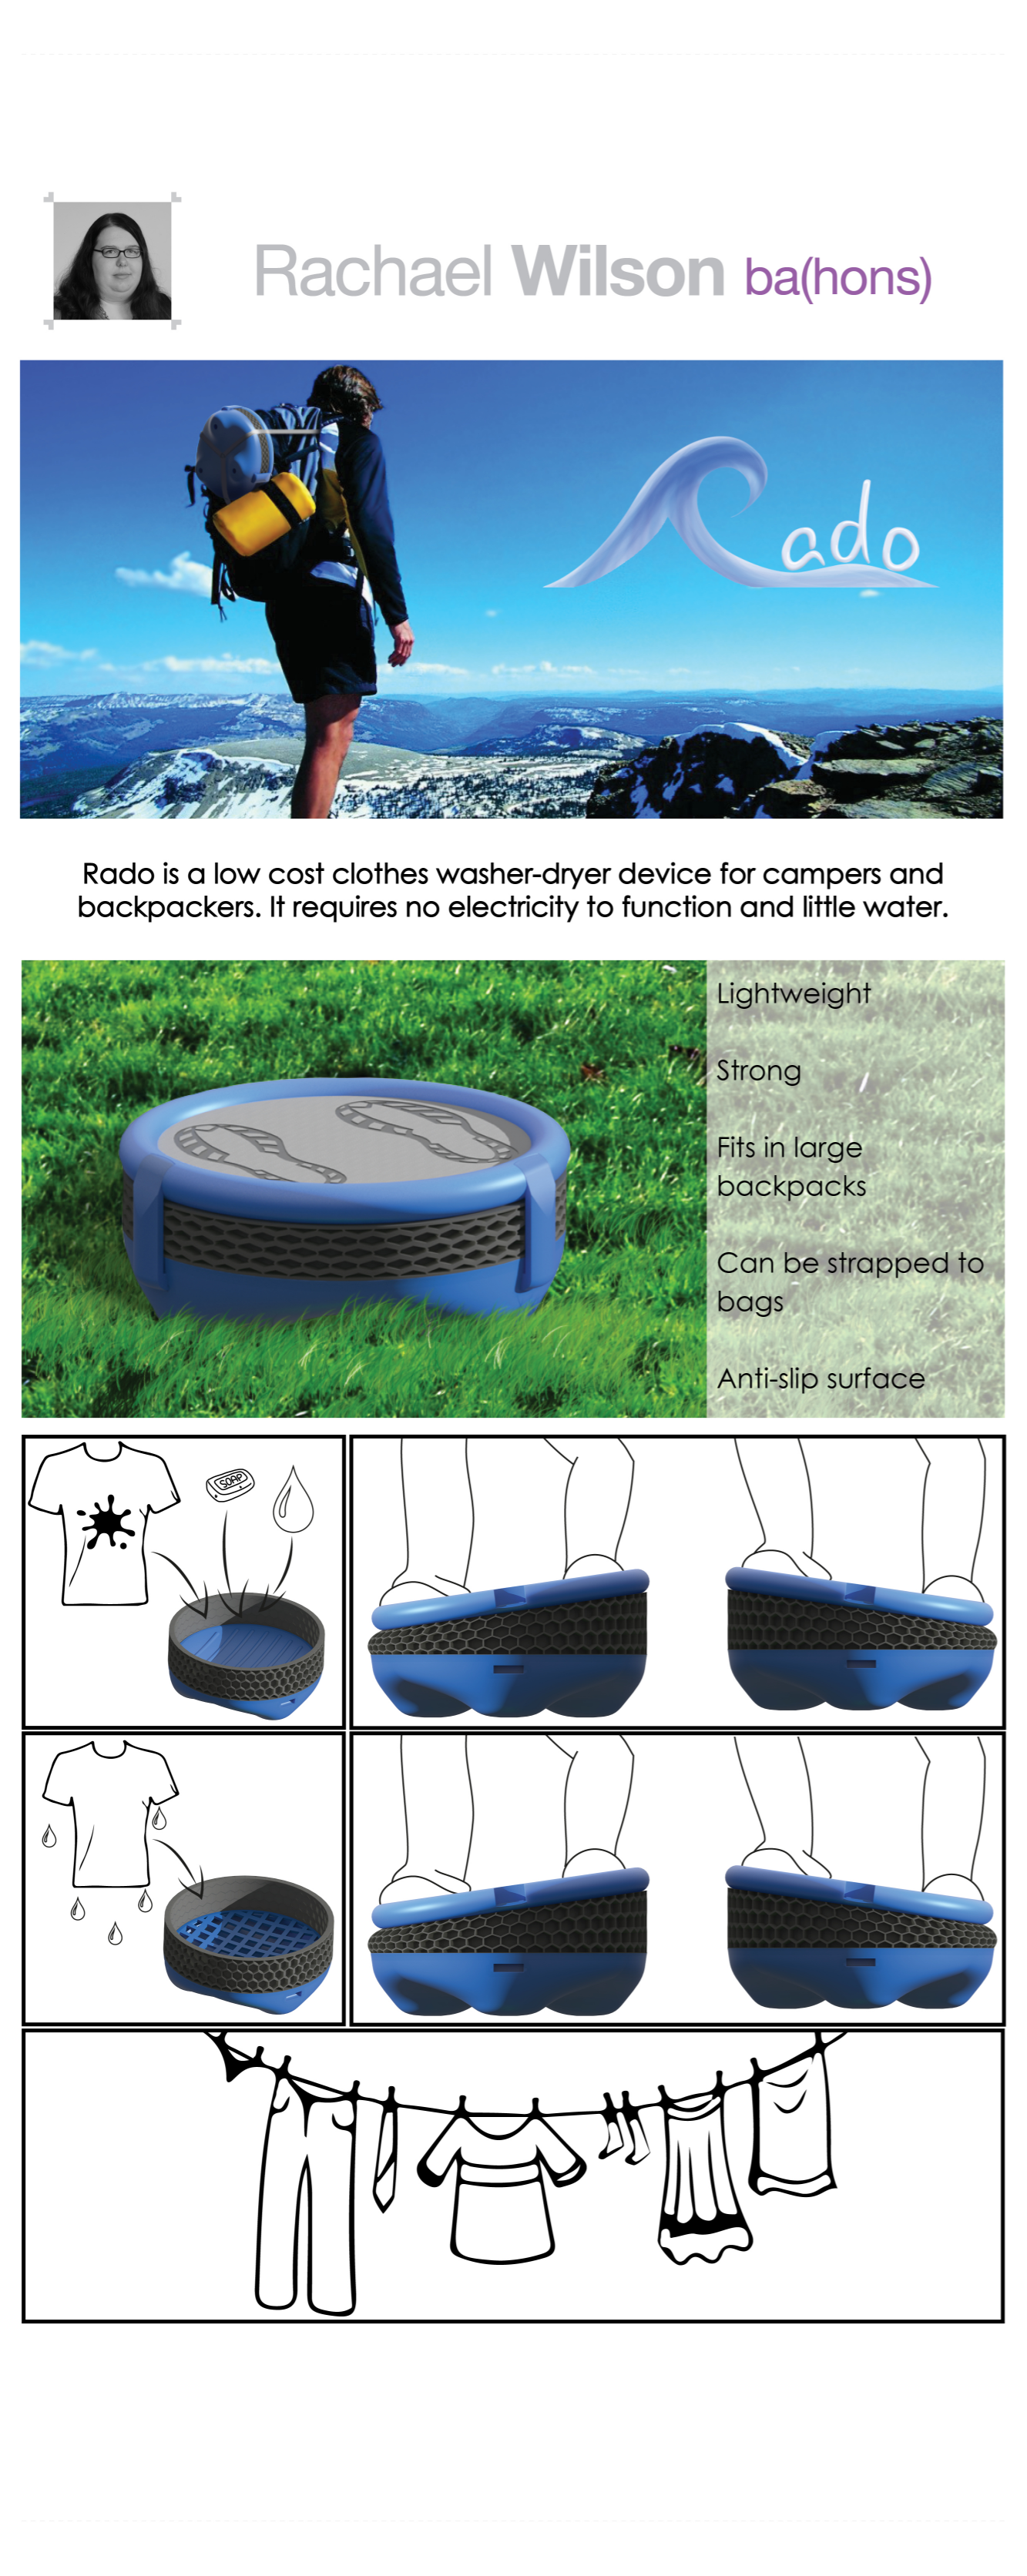
Banners and Renders
The good thing about a Solidworks model is that it makes it easy to get an image for Photoshoping as you can get a backgroundless .png file of the model that then can be rendered into an image. As this project for my third year at university I had to make a banner for the degree show. The Banner included 2 renders, a logo and an illustrator comic to show how the product worked. Below is the completed banner.